


Fixture Table And Tooling Assembly Help
Below is our general guide to assemble of our Mac Industries UK Self Build products (Tables and Tooling)
If you feel the assemble is something you don't have the time to tackle and would like to receive your order ready to go you can select "Ready Made by Mac" when adding your item to the basket then we / Mac Industries will prepare, assemble and weld your order so you can get straight to using your items and fabricate something awesome!
Any questions please get in touch...
0330 1333 868
info@macindustries.co.uk
Checks
Before starting with assemble ensure you have received all your parts and items undamaged from the delivery company. Your delivery should not have been exposed to the elements, double stacked, opened or received any damage. if they have please refuse delivery and contact us as soon as possible to resolve this with the delivery company.
Prep
If you have purchased a modular self build table or tooling you should begin with checking over all the part individually and lightly de-burring the laser cut interfaces (tabs and slots). The fibre laser cutter will leave a side of the steel with small amounts of molten steel (slag) a quick light pass with a flap disc grinder (air / angle) will quickly remove this and ensure a tight fitment and ensure a flat true finish product. We will try and de-burr your parts for you but this is depending on our workshop load.
Assembly
Once you have de-burred and prepped your parts assemble these as per the product images and relevant drawings supplied with the product. Once together (dry fit) and your happy with the fitment and location of parts being to clamp the joints ensuring the plates are clamped sufficiently to the laser cut edge. There must be no gaps (visible light) between the parts.
Table Assembly Tips: if you are assembling a table there are a few methods of clamping available .
1) Begin with the top plate face down, Either on a pallet or steels just something to raise the plate in the four corners (large tables support the centre also) So you're able to safety access the underside to aid clamping. Assemble the sub-frame cross members as per the slot arrangement and dry fit to the top plate.
2) Clamping the Sub-frame to the top plate.
- Using threaded bar as seen below either using our assembly plates or long bolts / unistrut or something to the same effect where your able to clamp and secure the cross section of the sub-frame to pull the top plate tight to the laser cut edges.
Side Skirt TIP: Is you have side skirts on your table also dry fit these now as this will aid construction and square the sub-frame. Using either sash clamps, threaded bar to pull the skirt plates tight with the subframe and also including clamping the top plate with the skirt.
Welding
3) Welding
Once you have the table clamped up as mentioned above and you're happy with the fitment and construction you can now being welding the parts together. MIG or TIG is acceptable. We advise being in the middle and working out, place a small tack either side of the cross section in both direction. (see images). Please take regular intervals during welding to reduce the heat impact on the top plate. Take your time.
Once you have finished tacking up the underside. (including side skirts if relevant) You can now turn the table over (You might been extra hand or two, be safe!)
Once turned over you can finish your table off by welding the tab and slot interface up , again either using Mig or Tig.
Finishing
Once cooled finish off by cleaning up your welds ensuring to remove any high spots of weld. Now Stand back for a minute, enjoy... now get get using it and make something awesome.
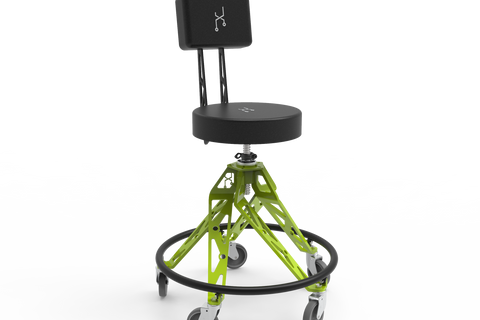
Fitment of Castors
If you have purchased Foot Master Type Castors with your table, you will be provided with 4x castors per box, 4x M12/1 threaded studs an 4x nuts.
If you have a self-build table you can use the nuts to weld on this inside of the foot plates to make a captive nut otherwise you can thread the foot plate and discard of the nuts.
If you have a ready made table you DO NOT require the nuts
we thread the foot plate so the nuts are not required. and the Thread stud should be threaded in to the castors until it stops and then threaded into the
legs. ensure the castor is tight to the leg plate and there is contact between the castor plate and leg plate to distribute load.
If you have a read made table you DO NOT require the nuts we thread the foot plate so the nuts are not required. and the Thread stud should be threaded in to the castors until it stops and then threaded into the legs. ensure the castor is tight to the leg plate and there is contact between the castor plate and leg plate to distribut load.